

Best Garlic Mayo Recipe

If you have ever dipped a crispy french fry into a thick, garlicky, velvety sauce and felt like your taste buds just did a happy dance you already know the magic of Garlic Mayo. This easy Garlic Mayo recipe is the kind of condiment that quietly steals the show at every meal. It is creamy, punchy, deeply savory, and takes less than 10 minutes to make from scratch. Once you try homemade Garlic Mayo, you will never go back to the bottled stuff again.
I have been making this recipe for years, testing countless variations, tweaking ratios, trying different garlic preparations, and experimenting with every technique imaginable. The result is what I believe to be the absolute best Garlic Mayo recipe you will find anywhere bold, balanced, and completely foolproof. Whether you are a seasoned home cook or a total beginner, this recipe is for you.
What is Garlic Mayo?
Garlic Mayo sometimes called garlic mayonnaise or garlic aioli is a creamy, rich condiment made by combining mayonnaise with garlic and a few other simple ingredients. It serves as a dip, a spread, a sauce, and an all-around flavor booster that can transform even the most ordinary dish into something extraordinary.
At its most basic, Garlic Mayo is mayonnaise that has been infused with the bold, pungent flavor of garlic. But when you make it the right way from scratch, using fresh garlic, good quality mayo, a squeeze of lemon, and just the right seasoning it becomes something truly special. It is one of those condiments that once you make it at home, you will find yourself putting it on everything.
The beauty of this easy Garlic Mayo recipe is how versatile it is. You can keep it simple and classic, or you can dress it up with fresh herbs, a kick of heat, a hint of smokiness, or a bright splash of lemon juice. It adapts to your taste, your cuisine, and your occasion.
History & Origin of Garlic Mayo
The story of garlic mayo is rooted in the ancient culinary traditions of the Mediterranean. The concept of a garlic-based emulsified sauce dates back centuries, with the earliest versions appearing in the coastal regions of southern France, Spain, and Italy areas where garlic grew abundantly and olive oil was the fat of choice.
The most historically significant ancestor of garlic mayo is aioli (from the Provençal words for “garlic” and “oil”), which was a sauce made by slowly emulsifying raw garlic with olive oil and sometimes egg yolk. This labor-intensive sauce was a staple food of Provence, France, and Catalonia, Spain, where it was served with fish, vegetables, and bread.
Over time, as mayonnaise became a widely used industrial condiment in the 20th century, home cooks and chefs began blending it with garlic to create a quicker, easier version of aioli. This hybrid what we now commonly call Garlic Mayo became popular across Europe, the Middle East, and eventually spread worldwide. In countries like Lebanon, Pakistan, and across Southeast Asia, garlic mayo became a staple condiment served alongside shawarma, grilled meats, sandwiches, and street food of all kinds.
Today, garlic mayo is one of the most popular condiments in the world. It appears in some form in nearly every cuisine, and every region has its own spin on it. But the heart of it creamy, garlicky, rich, and satisfying remains the same everywhere.
What Does Garlic Mayo Taste Like?
Garlic Mayo has a flavor profile that is rich and creamy from the mayonnaise base, sharp and pungent from the raw garlic, slightly tangy from a touch of lemon or vinegar, and deeply savory all the way through. The garlic is the star it gives the sauce its signature bold bite that lingers pleasantly on the palate.
The key to great garlic mayo is balance. Too much garlic and the sauce becomes overwhelming and harsh. Too little and you lose the whole point. The right ratio creates something that is unmistakably garlicky but still smooth, creamy, and incredibly moreish.
When made with fresh garlic that has been properly prepared (more on that in a moment), the sauce has a clean, bright, punchy flavor that feels vibrant rather than aggressive. A squeeze of fresh lemon juice adds a subtle brightness that lifts all the other flavors and keeps the sauce from feeling too heavy.
Is Garlic Mayo the Same as Aioli?
This is one of the most common questions people ask, and the honest answer is: sort of, but not exactly. Traditional aioli is made by emulsifying raw garlic with olive oil (and sometimes egg yolk) from scratch it contains no commercial mayonnaise at all. The result is a thick, intensely garlicky, slightly coarser sauce with a pronounced olive oil flavor.
Garlic Mayo, on the other hand, starts with a base of store-bought or homemade mayonnaise and adds garlic to it. This makes it significantly easier and faster to prepare, and the texture is smoother and lighter than traditional aioli.
In modern culinary usage, the lines between the two have blurred considerably. Most restaurants and food blogs that offer “aioli” on their menus are actually serving garlic mayo — the mayonnaise-based version. Both are delicious, but they are technically distinct preparations.
For everyday cooking purposes, garlic mayo is the practical choice. It is quicker, more consistent, and works beautifully in virtually every application where you might want a garlicky creamy sauce.
What Makes Homemade Garlic Mayo Different from Store-Bought?
The difference between homemade Garlic Mayo and the bottled version from the supermarket is night and day. Here is exactly what sets homemade apart:
Fresh garlic flavor: Bottled garlic mayo relies on garlic powder or garlic extract, which produces a flat, artificial flavor. Homemade uses real, fresh garlic, which gives you that bright, complex, multi-layered garlicky punch that commercial products simply cannot replicate.
Control over ingredients: When you make it at home, you control every single ingredient. You decide how garlicky it is, how tangy, how thick, and whether you add any extras like herbs, spice, or lemon zest.
No preservatives or additives: Store-bought versions are loaded with stabilizers, preservatives, and artificial flavors to extend shelf life. Homemade is clean, fresh, and made with real food.
Customizable consistency: You can make it as thick or as pourable as you like, adjusting it to suit your intended use whether you want a thick dip or a drizzleable sauce.
It just tastes better: There is no way around it. Fresh, homemade Garlic Mayo has a depth of flavor that store-bought products simply cannot match.
Ingredients You Need
One of the best things about this homemade Garlic Mayo recipe is how simple the ingredient list is. You likely already have most of these items in your kitchen right now.
For the Garlic Mayo
Mayonnaise (1 cup / 240g): The base of the sauce. Use a good quality, full-fat mayonnaise for the best flavor and texture. I prefer brands like Hellmann’s (Best Foods) or Duke’s. You can also use homemade mayonnaise if you want to go fully from scratch the result will be even richer and creamier.
Fresh Garlic Cloves (4 to 6 large cloves): This is the heart of the recipe. Use fresh garlic not pre-minced jarred garlic, not garlic powder, not garlic paste in a tube. Fresh, raw garlic cloves give the sauce its signature sharp, vibrant, complex flavor. The number of cloves can be adjusted based on your garlic preference. Four cloves gives a moderate garlic flavor; six cloves gives a bold, punchy result that true garlic lovers will adore.
Fresh Lemon Juice (1 to 2 tablespoons): Freshly squeezed lemon juice is essential. It cuts through the richness of the mayo, adds brightness, and helps the garlic flavor shine rather than turn bitter. Do not substitute with bottled lemon juice the flavor is noticeably different and far less vibrant.
Dijon Mustard (1 teaspoon): A small amount of Dijon mustard does two important things: it adds a subtle depth of flavor (without tasting like mustard), and it acts as an emulsifier that helps the sauce stay stable and creamy. This is a secret weapon ingredient that elevates the final result significantly.
Extra Virgin Olive Oil (1 to 2 tablespoons, optional): Adding a small drizzle of good extra virgin olive oil gives the garlic mayo a richer, more complex, slightly Mediterranean character. It bridges the gap between a simple garlic mayo and a true aioli. This is optional, but if you have good olive oil on hand, I highly recommend it.
Salt (1/2 teaspoon, or to taste): Use fine sea salt or kosher salt. Season carefully a little goes a long way, and the mayonnaise base already contains some salt.
Black Pepper (1/4 teaspoon, freshly ground): A small amount of freshly ground black pepper adds a gentle warmth that balances the garlic and lemon beautifully.
Fresh Parsley (1 tablespoon, finely chopped optional): A small amount of fresh flat-leaf parsley adds a pop of color and a fresh herbal note that works particularly well if you plan to serve the garlic mayo as a dip or alongside grilled foods.
Pinch of Cayenne Pepper or Paprika (optional): A tiny pinch of cayenne adds a subtle warmth and a hint of heat. Smoked paprika adds a beautiful reddish color and a smoky depth that works especially well when serving the sauce with chicken or seafood.
Ingredient Substitutions & Notes
Can I use light mayonnaise? Yes, but the texture will be slightly thinner and the flavor a bit less rich. Full-fat mayo is always preferred for the best result.
Can I substitute garlic powder for fresh garlic? You can in a pinch, but the flavor will be significantly less vibrant and complex. If using garlic powder, start with 1/2 teaspoon and adjust to taste. I always recommend fresh garlic whenever possible.
No lemons? Use white wine vinegar or apple cider vinegar in a 1:1 ratio as a substitute. The flavor will be slightly different but still effective.
Dairy-free or vegan? Use a vegan mayonnaise (such as Hellmann’s Vegan or Just Mayo) and follow the recipe exactly. The result is just as creamy and delicious.
For a richer sauce, try replacing 2 tablespoons of the mayonnaise with full-fat sour cream or Greek yogurt. This adds a pleasant tanginess and a slightly lighter texture.
How to Make Garlic Mayo (Step-by-Step)
Making this easy Garlic Mayo recipe is genuinely one of the simplest things you can do in a kitchen. No cooking required, no special equipment needed beyond a knife and a bowl. Here is exactly how to do it, step by step, for a perfect result every single time.
Step 1: Gather & Prep Your Ingredients
Before you begin, make sure all your ingredients are at room temperature, especially the mayonnaise. Cold ingredients can make the sauce harder to blend smoothly, and room temperature mayo creates a better, more cohesive emulsion when mixed with the other ingredients.
Measure out your mayonnaise into a medium mixing bowl. Squeeze your lemon juice and set it aside. Have your salt, pepper, and mustard ready. If you are adding olive oil or any optional extras, have those measured and ready to go as well.
Step 2: Prepare the Garlic
This is the most important step, and it is where most people either get it right or get it wrong.
Start by peeling your garlic cloves. Then, using a sharp knife, mince the garlic as finely as possible you want it almost paste-like in texture. The finer the garlic is broken down, the more evenly distributed and smoothly integrated it will be in the final sauce.
For an even better result, use one of these two techniques:
The microplane method: Grate the peeled garlic cloves on a fine microplane grater directly into the bowl. This creates an ultra-fine garlic paste that integrates seamlessly into the mayo, giving you a smooth, uniform sauce with intense garlic flavor and no chunky bits.
The salt crushing method: Mince the garlic roughly, then sprinkle a generous pinch of salt over it. Using the flat side of your knife blade, repeatedly press and drag the salted garlic across the cutting board. This action crushes the garlic cells and draws out their juices, creating a smooth, paste-like consistency. This is the classic professional chef technique for making garlic paste, and it produces an incredibly smooth, deeply flavored result.
Never use a garlic press it creates uneven, watery garlic with a slightly harsh, metallic edge. The microplane or salt-crush method is always superior.
Step 3: Mix the Base
Add the prepared garlic paste to the bowl with the mayonnaise. Add the Dijon mustard and a squeeze of lemon juice. Using a silicone spatula or a whisk, begin mixing everything together. Start gently, then mix more vigorously as the ingredients start to combine.
Mix until the garlic is completely and evenly distributed throughout the mayo, with no visible streaks or clumps. The mixture should be uniform in color and texture at this stage.
Step 4: Blend & Emulsify
If you want an ultra-smooth, restaurant-quality garlic mayo with the silkiest texture possible, this is the step that makes all the difference.
Transfer the mixed sauce to a small food processor or use an immersion blender to blend everything together for about 30 seconds. This extra blending step completely emulsifies the garlic into the mayo, creating a sauce so smooth and cohesive that it feels almost like it was made in a professional kitchen.
If you do not have a food processor or immersion blender, do not worry — a very thorough hand-mixing with a whisk will also produce a great result. It just requires a bit more effort to get everything fully incorporated.
If you are adding olive oil, this is the point where you do it. With the blender or processor running, slowly drizzle in the olive oil in a thin, steady stream. This incorporates it gradually and maintains the creamy emulsion. If adding by hand, drizzle the oil in a little at a time, whisking constantly as you go.
Step 5 – Taste, Season & Rest
This final step is absolutely crucial and must never be skipped. Taste your garlic mayo and adjust the seasoning carefully.
Does it need more salt? A little more lemon juice for brightness? Another hint of garlic? More pepper? A tiny pinch of cayenne for warmth? Adjust now, tasting as you go, until the sauce tastes perfectly balanced to you.
Once seasoned, cover the bowl with plastic wrap or transfer the sauce to an airtight jar or container. Refrigerate it for at least 30 minutes before serving ideally for 1 to 2 hours. This resting time is essential because it allows the garlic to fully infuse into the mayo, the flavors to meld and deepen, and the sauce to thicken slightly as it chills. The garlic mayo you taste fresh
out of the bowl is good. The garlic mayo after it has rested in the fridge for an hour is extraordinary.
What to Serve with Garlic Mayo?
The better question might be: what can you NOT serve with garlic mayo? This sauce is one of the most versatile condiments in existence. Here are the best ways to use it.
Best Dipping Ideas
French fries and potato wedges: This is the most iconic pairing. Crispy, golden fries dipped into thick, creamy garlic mayo is one of life’s great simple pleasures. Try it instead of ketchup and you may never go back.
Onion rings: The richness of garlic mayo perfectly complements the crispy, savory sweetness of onion rings.
Chicken tenders and nuggets: Skip the honey mustard and try garlic mayo instead. The combination is addictive.
Vegetable crudités: Carrots, celery, cucumber slices, bell pepper strips, and broccoli florets are all transformed when paired with a good garlic mayo dip.
Grilled shrimp and calamari: Garlic mayo is a natural partner for fried or grilled seafood of all kinds.
Breadsticks and crusty bread: Serve a bowl of garlic mayo alongside warm, fresh-baked bread as an appetizer and watch it disappear in minutes.
Mozzarella sticks and jalapeño poppers: Any kind of fried, cheesy appetizer is instantly better with garlic mayo on the side.
Best Spread & Sauce Uses
Burgers: Replace your standard ketchup or mustard with a thick smear of garlic mayo on both the top and bottom bun. It completely elevates any burger to gourmet territory.
Sandwiches and wraps: Garlic mayo makes an outstanding spread for all kinds of sandwiches chicken, turkey, beef, veggie, or fish. It is also the perfect sauce for shawarma wraps, club sandwiches, and BLTs.
Grilled chicken: Brush garlic mayo onto chicken breasts or thighs before grilling. It creates a gorgeous, golden crust and locks in moisture, resulting in incredibly juicy, flavorful meat.
Fish and seafood: Serve garlic mayo alongside grilled salmon, pan-fried cod, or fish tacos. It is also the classic sauce for fish and chips.
Pizza drizzle: A thin drizzle of garlic mayo over a freshly baked pizza (especially one topped with chicken or bacon) is a game-changer.
Pasta salad dressing: Thin the garlic mayo slightly with a little lemon juice or water and use it as a dressing for cold pasta salads.
Roasted vegetables: Toss roasted potatoes, cauliflower, or broccoli in garlic mayo right before serving for an incredibly flavorful side dish.
Pro Tips for the BEST Garlic Mayo
These are the details that separate a good garlic mayo from a truly exceptional one. Pay attention to each of these, and your results will be consistently outstanding.
My #1 Secret for Ultra-Creamy Garlic Mayo
The single most important thing you can do for this recipe is to let it rest. Do not skip the chilling time. After mixing your garlic mayo, cover it and refrigerate it for at least 30 minutes but ideally 1 to 2 hours or even overnight.
During this time, several things happen: the sharp, raw edge of the fresh garlic mellows and rounds out; the flavors meld and deepen into something more cohesive and complex; the sauce thickens slightly as it chills; and the lemon juice and salt have time to fully penetrate and season every drop of mayo.
A freshly made garlic mayo is fine. A garlic mayo that has rested for a few hours is incredible. Make it ahead of time whenever you can.
How to Get the Perfect Garlic Flavor Every Time
The garlic preparation method matters more than almost any other variable in this recipe.
Always use fresh garlic not garlic powder, not jarred minced garlic, not garlic flakes. Fresh, raw cloves have a complex, multi-layered flavor that no processed alternative can match.
Use the microplane grating technique or the salt-crush method described in Step 2. Both techniques break down the garlic cells completely, releasing the essential oils and creating a paste-like consistency that blends seamlessly into the mayo without any harsh or chewy bits.
The amount of garlic is, of course, a matter of personal preference. I recommend starting with four large cloves and tasting before adding more. You can always add more garlic, but you cannot take it away once it is in.
If you find raw garlic too sharp or pungent for your taste, try roasting the garlic first (see the Roasted Garlic Mayo variation below). Roasted garlic has a sweeter, mellower, almost nutty flavor that creates a completely different but equally delicious version of garlic mayo.
Common Mistakes to Avoid
Using cold ingredients: Always bring your mayonnaise to room temperature before mixing. Cold mayo does not emulsify as well and can result in a slightly broken, grainy texture.
Skipping the resting time: As mentioned above, resting is essential. Do not serve fresh-made garlic mayo without at least 30 minutes of chilling first.
Using too much garlic too soon: Start with less than you think you need. You can always add more after tasting, but an overpoweringly garlicky mayo is difficult to fix.
Over-blending with a food processor: If using a food processor or blender, blend just until smooth 20 to 30 seconds is enough. Over-blending can cause the mayo to break or become overly thin.
Using bottled lemon juice: Always use fresh-squeezed lemon juice. The flavor of bottled lemon juice is noticeably flat and synthetic in comparison.
Not seasoning properly: Taste your sauce and season carefully before serving. Underseasoned garlic mayo lacks depth and impact.
Garlic Mayo Variations You Will Love
Once you have mastered the classic recipe, these variations open up a whole new world of flavor possibilities. Each one starts with the base garlic mayo and builds on it in a different direction.
Spicy Sriracha Garlic Mayo
Add 1 to 2 tablespoons of Sriracha sauce and a pinch of cayenne pepper to the base garlic mayo recipe. Mix well and taste for heat level. This spicy version is absolutely incredible with fried chicken, fish tacos, sushi rolls, and Korean-style fried chicken. It has a beautiful orange-red color, a creamy texture, and a balance of heat, garlic, and richness that is genuinely addictive.
Lemon Herb Garlic Mayo
Add the zest of one lemon along with extra lemon juice, plus 2 tablespoons of finely chopped fresh herbs (flat-leaf parsley, chives, dill, or a combination of all three). This lighter, fresher version works beautifully as a sauce for grilled fish, shrimp, roasted vegetables, and cold seafood platters. The herbs add color, freshness, and a beautiful aromatic complexity.
Roasted Garlic Mayo
Instead of raw garlic, use an entire head of roasted garlic. To roast garlic, slice off the top of a whole head, drizzle generously with olive oil, wrap in foil, and roast at 400°F (200°C) for 40 to 45 minutes until the cloves are golden, soft, and caramelized. Squeeze the soft, golden cloves out of their skins and mash into a smooth paste, then blend into the mayo base. Roasted garlic mayo has a sweeter, more mellow, deeply savory flavor that is less sharp than the raw version it is extraordinary on steak sandwiches, burgers, and as a dip for crusty bread.
Chipotle Garlic Mayo
Add 1 to 2 chipotle peppers in adobo sauce (finely minced) along with 1 teaspoon of the adobo sauce itself to the base recipe. The chipotle adds a smoky, slightly spicy, deeply savory dimension that is absolutely incredible with Mexican-inspired dishes, grilled corn, tacos, and burgers. This is one of the most popular variations for good reason it has an incredible complexity of flavor.
How to Store Garlic Mayo Properly
Proper storage is essential for both food safety and maintaining the quality of your garlic mayo.
Refrigerator Storage Tips
Transfer your finished garlic mayo to a clean, airtight container or jar a mason jar works perfectly. Press a piece of plastic wrap directly against the surface of the sauce before sealing the lid. This prevents a skin from forming on top and keeps the sauce fresh.
Store in the coldest part of your refrigerator, ideally toward the back rather than in the door where temperatures fluctuate.
Homemade Garlic Mayo will keep well in the refrigerator for up to 5 to 7 days. Because it is made with fresh garlic and no preservatives, it does have a shorter shelf life than store-bought versions. Always check for any off smells or change in texture before using.
Always use a clean spoon or spatula to serve from the jar never double-dip or use utensils that have touched other foods, as this can introduce bacteria and shorten the shelf life.
Can You Freeze Garlic Mayo?
Freezing garlic mayo is not recommended. Mayonnaise is an emulsion of fat and water, and freezing disrupts this emulsion irreversibly. When thawed, the mayo will separate and become watery, grainy, and unpleasant in texture it simply cannot be saved after freezing.
Because the recipe takes less than 10 minutes to make, it is always better to make a fresh batch whenever you need it. However, if you make a larger batch than needed, it keeps well in the fridge for up to a week, so there is rarely a reason to freeze it.
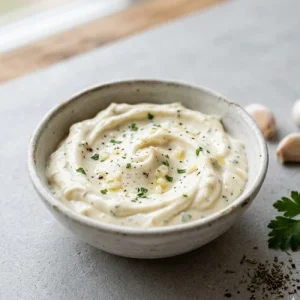
Garlic Mayonnaise Recipe

Equipment
- 1 medium mixing bowl
- Microplane grater or sharp chef's knife and cutting board
- Whisk or silicone spatula
- Measuring spoons and measuring cups
- Small food processor or immersion blender
- Airtight jar or container for storage
Ingredients
- 1 cup 240g full-fat mayonnaise, room temperature
- 4 to 6 large fresh garlic cloves peeled (adjust to taste)
- 1 to 2 tablespoons fresh lemon juice from approximately 1 lemon
- 1 teaspoon Dijon mustard
- 1 to 2 tablespoons extra virgin olive oil optional, for richer flavor
- 1/2 teaspoon fine sea salt or to taste
- 1/4 teaspoon freshly ground black pepper
- 1 tablespoon fresh flat-leaf parsley finely chopped (optional)
- Pinch of cayenne pepper or smoked paprika optional
Instructions
- Prepare the garlic: Peel the garlic cloves and grate them on a fine microplane grater directly over your mixing bowl, or mince finely and then crush into a paste using the flat of your knife blade with a pinch of salt. Paste-like consistency is the goal.
- Combine the base ingredients: Add the room-temperature mayonnaise to the bowl with the garlic paste. Add the Dijon mustard and 1 tablespoon of fresh lemon juice. Stir together with a whisk or spatula until fully combined.
- Blend for smoothness (optional but recommended): For the smoothest possible texture, transfer to a small food processor or use an immersion blender and blend for 20 to 30 seconds. If adding olive oil, drizzle it in slowly while blending.
- Season carefully: Add salt, pepper, and any optional extras (cayenne, paprika, parsley). Taste and adjust add more lemon juice for brightness, more salt for depth, or more garlic for punch.
- Rest before serving: Cover and refrigerate for a minimum of 30 minutes (1 to 2 hours is ideal) to allow the flavors to develop and meld. Serve chilled.
Notes
- Best garlic prep: Use a microplane grater or the salt-crush method for the smoothest, most evenly flavored result. Never use a garlic press.
- Room temperature matters: Use mayo straight from the pantry or let refrigerated mayo sit out for 20 minutes. Cold mayo does not blend as smoothly.
- Do not skip the rest: The 30-minute minimum resting time in the fridge is essential for the best flavor. Overnight resting produces the most deeply flavored result.
- Garlic intensity: For a milder flavor, use 3 to 4 cloves. For bold, restaurant-style garlic punch, use 5 to 6. Taste and adjust.
- Vegan option: Use vegan mayo (Hellmann’s Vegan, Just Mayo, or similar) same measurements, same steps, equally delicious.
- Storage: Store in an airtight container in the refrigerator for up to 5 to 7 days. Do not freeze.
- Fixing separated sauce: If the sauce separates or becomes too thin, fold in 1 to 2 tablespoons of fresh mayo by hand to bring it back together.

This recipe is an absolute game changer! The microplane technique gives it the perfect silky texture, and that garlicky punch is pure perfection.
Absolutely flawless recipe! The microplane trick makes it incredibly velvety, and the fresh lemon juice cuts the richness perfectly. Goodbye, store-bought jars!